In today’s digital age, where 97% of consumers turn to the internet to find local businesses, managing your online presence is vital. Your Google My Business (GMB) account ensures potential customers can quickly discover and engage with your company. In this article, we’ll walk you through the process of adding a manager to your GMB account and emphasize why this step is essential and how it ties into your overall business strategy.
Contents
Why Google My Business Matters:
Google My Business (now known as Google Business Profile) is more than just a listing. It’s your virtual storefront, the first impression you make on potential customers searching online. According to recent statistics, 97% of consumers turn to the Internet when looking for local businesses. Your GMB listing is often the first interaction customers have with your brand. It’s your opportunity to make a great impression, showcase your unique offerings, and engage with your audience.
The Impact of Adding a Manager:
You might wonder why you should add a manager to your GMB account. Well, think of it as expanding your team’s capabilities. Adding a manager empowers them to assist in managing your online presence effectively. They can respond to reviews, post updates and promotions, and ensure your listing is accurate and up-to-date. This delegation of tasks saves you time and ensures that your GMB account is active and engaging—a factor that can significantly impact your visibility in local search results.
Step-by-Step Guide:
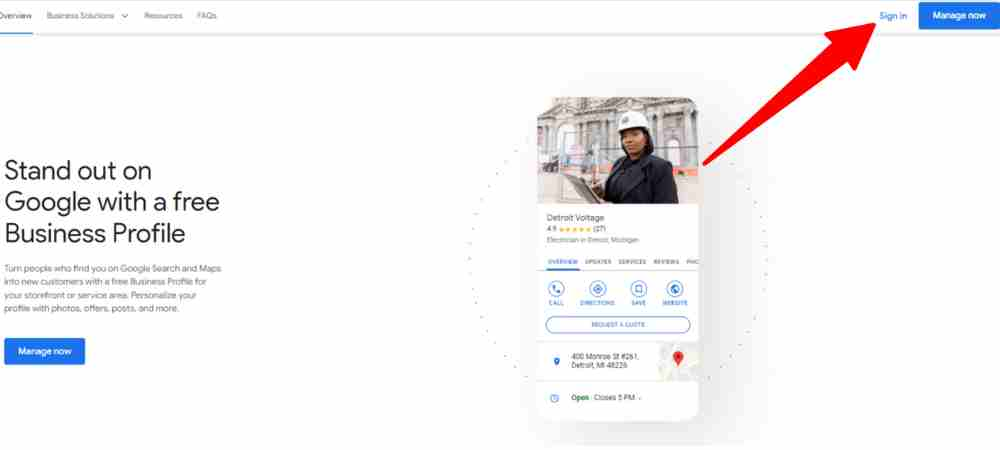
Step 1: Go to business.google.com
To begin, head over to business.google.com and log in to your account. Once logged in, select the specific location to which you’d like to grant the user access. This ensures that you’re focusing on the right area of your business.
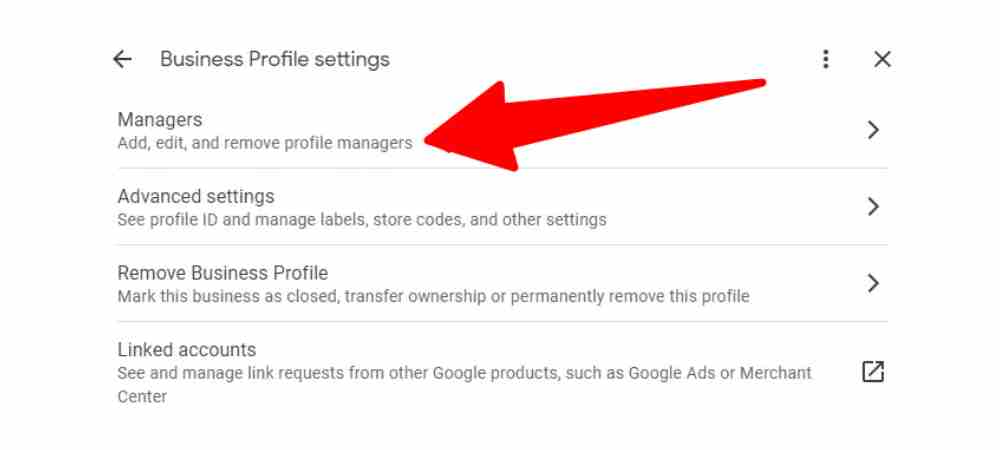
Step 2: Access the Main Menu
The hamburger menu icon is in the top left-hand corner of your screen. Click it to access the main menu, then navigate to the user management section. Select business profile settings.
Step 3: Select “People and Access” Option
Find and select the “people and access” option in the main menu. This will open up the user management screen, where you can make the necessary changes.
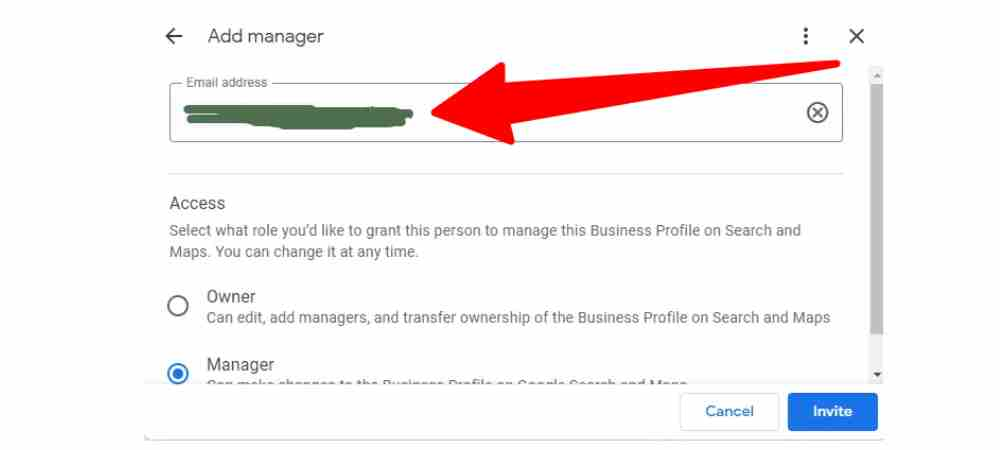
Step 4: Add a User
Take this opportunity to review your user access list. If you find any outdated entries, such as past employees or vendors, you can remove them by clicking the ‘X’ next to their name or email.
Step 5: Enter Email and Set Permissions
Now, the critical step is to enter the user’s email address you want to add. Choose their access level wisely. Owners can edit, add people, and transfer ownership of the Business Profile on Search and Maps. Managers can change the Business Profile on Google Search and Maps but cannot add people or transfer ownership of the business profile.
Additional Tips:
Review and Cleanup of User Access
Review and clean up your user access list regularly to ensure that only the right individuals have access to your GMB account.
In conclusion, adding a manager to your Google My Business account is a strategic move to enhance your online presence. With 97% of consumers relying on the internet to find local businesses, managing your GMB listing effectively is crucial. By following our step-by-step guide and understanding the roles, you can ensure that your business stands out and engages with your audience in the digital landscape. So, take control of your online presence today, and watch your business thrive!